Monday, April 23, 2012

Fermentation Chamber

Well I had been planning on making one for close to a year now. Just because I wanted to control the temps much closer.

But recently I was asked by my 7 year old if she can set up recycle bins in the pantry. My current fermentation place. So of course I have to say yes and out goes my stuff to the garage.

Brewing with out a fermentation chamber in New Mexico almost limits you to brewing in the winter as it would cost way too much to keep the entire house cool for the duration.

No basement and no sacrificial fridge.

So in the corner of my garage I have a perfect little area.


My plan was to use a mini fridge. So last year towards the end of the school year I trolled Craigslist in search of a college student looking to unload their mini fridge.

Scored this one for $30


Practically new and he still had the box.
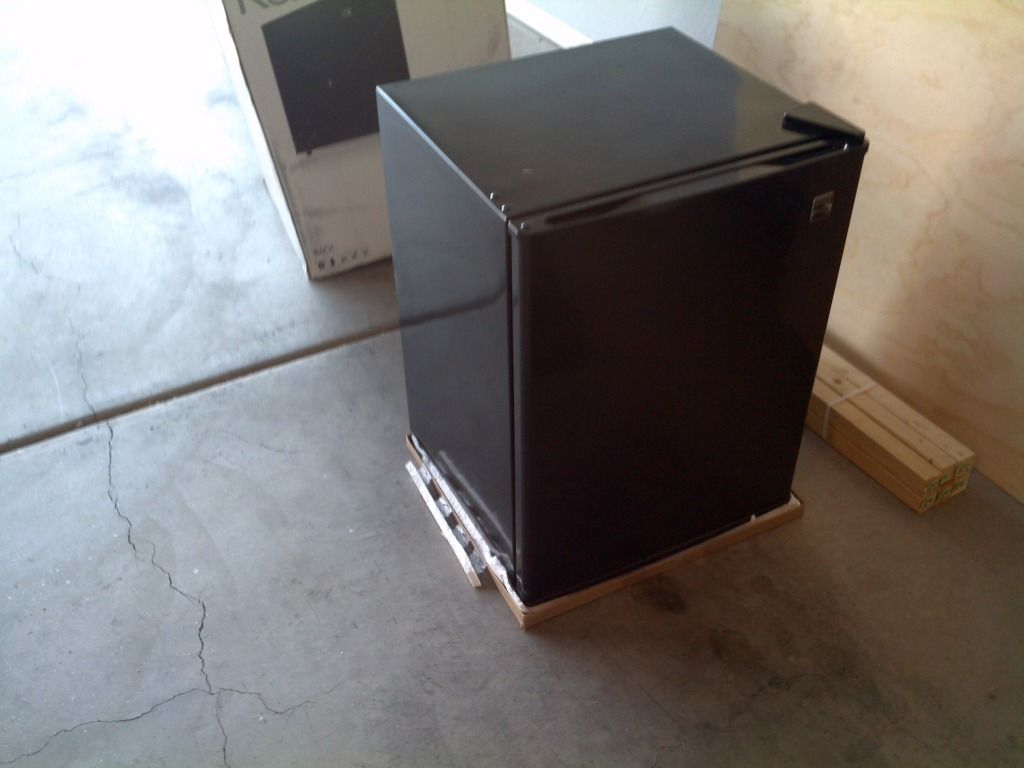


Went to buy the lumber. I had a sketch of what I wanted but I was really going to start with the dimensions of the space i had and work with that.

Base and frame


Floor and Walls on

In this picture you can barely see the area cut out on the left side for the back of the fridge to ventilate.

Nice Fit


Insulation and Door on


Now I must have strolled up and down every isle at Lowe's to try and come up with a way to get the door to seal to the wood frame. I was going to screw metal flashing to cutting custom metal sheets into thin strips. (the seal on the door has a magnetic strip in it to seal to the metal frame of the fridge)

Until finally I made it to what felt like the last isle and found a roll of magnetic tape. Perfect!

Before sticking the tape to the wood I had to cut it to length and let it stick to the seal on the door. Careful attention had to be made that it was placed with the right polarity or it might actually repel. Once I had them in place I pulled the backing off and stuck the tape to the plywood.

Downfall - The adhesive on the magnetic tape sucked. It began to peel off in 5 min. That is why you see it now being held on with thin strips of Foil tape. That stuff held great. Not as clean looking as I wanted but it works.

Door Shut


View Inside

Above you can see how the mini fridge sits. You can also see the floor. The floor is plywood on the bottom, then a layer of insulation, then covered with panel board to protect the insulation from tearing.

I put a piece of insulation on top and a sheet of plywood on top of that and plugged in the fridge for a test run. It dropped from 80°F to 70°F in 5 min but never went below that. Fridge was cooling well but it wasn't cooling the space inside.


I found that the vent out of the side of the box wasn't enough. The sides of the actual fridge itself were getting warm. I knew this is part of how a fridge works but forgot. So I then sealed it off from the main area inside as you see below.


I then added some fans to help circulation on the left side where the fridge was. This would allow the sides of the fridge to get some circulation and hopefully keep it from overheating. The fans were (2) 80mm computer fans from Best Buy. The power source was a Printer Power Supply from the bone yard at work.

Also added the Johnson Control Temp Controller and the top to the box. The top is plywood with a sheet of white panel board on top.


Currently it is working like a charm and is housing the current batch of Oatmeal Stout. It's fermenting away and sitting right at 65-67°F

Monday, April 16, 2012

Been WAY too long

Well it's been quite a while since my last post.

I know I'm the only one who reads these so I'm sure the world didn't miss much.

But none the less I plan on getting back into the swing of things.

I have a new DIY project I have just finished and need to do a writeup on and some new brews to make!!

Stay tuned

-Rudy

Wednesday, October 28, 2009

Batch #8 was a BUST! :(

Sampled the stuff tonight ... YUCK!! That nasty fermenting smell is still there as soon as I popped the top.

Ok. First off. I can drink damn near any beer. BUT!!

That stuff smelled like dog piss! No joke there!

So yeah. I couldn't suck down a full bottle. Going to save a few and let them sit.

But honestly .. how good could aged dog piss taste?!?!

After making it I read that most use Apple Juice and not Cider. Wonder if that was a part of the cause or if it was the short spike in fermenting temp.

Bottled Batch #9 - Honey Wheat

Well it has been a little over two weeks and the fermentation has not budged from 1.016 in the last 3 days.

Time to prep the soldiers. Here they are sanitized, primed, and ready for their mission!


And After:


Notice the Mr. Beer bottle. That's my trub/carb test bottle :)

Now after all the fun comes the fun task of cleaning YUCK!

I'll be working on a new label I think for this batch and new name. Need something a little more original.

Sunday, October 11, 2009

Bottled Batch #8 & Brewed Batch #9

Well today I started another batch of my favorite Honey Wheat. 5 gallon size.

  • 6.6 lb of Wheat extract (Muntons)
  • 2 cups sugar
  • 12oz Honey
  • 2 oz Hallertauer Hops (60 min)
  • Pitched with Wyeast 3056 with a 4hr swell.
Everything seemed to go as planned. Pitched the yeast at 80°F and it's now sitting at 74°F. Hope to get it down to about 70°F and keep it there.

OG: 1.068

Yesterday:
I decided to check the SG of the hard cider and it was already down to 0.996. That was VERY fast. Only 6 days. I'm hoping it didn't go bad. Had a funny smell but I have heard ciders smell funny. Tasted ok but the Mr Beer cider I brewed last took a while for the flavor to mellow out. I'm hoping this one didn't go bad. So I bottled it up and hope it turns out ok.

This would give the Hard Cider an ABV of 8.5% A bit more then I intended :)

Monday, October 5, 2009

Musselman's Hard Cider

Well it has been a while. With the new baby and the hot summer temperatures I just didn't find myself brewing for a while.

But Last night came Batch #08

Batch #08:
Musselman's Hard Cider (MB Size)

2.5 - Gal of Apple Cider
1.25 - Tsp of Yeast Nutrient
1 - Packet of Red Star Champagne Yeast
OG - 1.061

Simple Simple Simple. Sterilized. Poured in the cider at room temp. Added Yeast nutrient. Pitched Yeast. Put the lid on and done!

Here is a picture of the Cider used.


Next up will be another batch of the Honey Wheat by request from my Father-in-law :)

Monday, June 22, 2009

Bottling Day

Well I actually bottled Saturday but am just now getting around to posting. Been pretty busy around here getting ready for the new baby to come. Less then 2 weeks left!!! WooHoo!!!

Not much to say. Bottled up the Toutle River Tart and the DuceDuce WCPA.

Here is a picture of the two squads. The Toutle River Tart is in the front in 12oz bottles and the DuceDuce WCPA in the back.


With the DuceDuce name I thought it only be appropriate that the beer go into 22oz bottles :)


Here we have the bottles with their labels on.


Very Important Tip About Labels!!

My first attempt at labels I bought some Avery 3"x4" and they worked great. That is until it was time to take them off. Lets just say a 24hr soak in warm water and oxi-free out back in the ice-chest and an additional 4hrs of elbow grease and Goo Gone they finally came off. Then I had to thoroughly clean the bottles.

New way of labeling: Simply print the labels on plain paper, cut out, and apply to the bottles with Elmers Glue Stick. They hold perfectly fine in storage and come right off under running water. Yes, Running water!! No more scrubbing, rubbing, finger nail scraping and cussing!